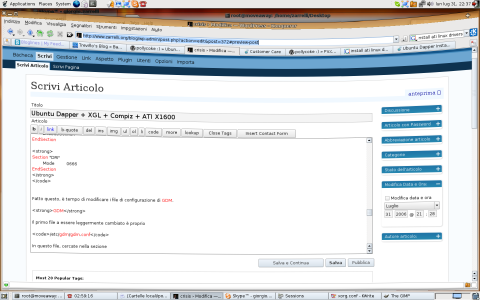
Ubuntu Dapper + XGL + Compiz + ATI X1600

Seguendo il semplice tutorial fornito da Pollycoke, ho provato a installare Xgl e Compiz su una Ubuntu Dapper messa in movimento da una scheda grafica ATI X1600, notando con mio sommo dispiacere che l’howto va leggermente modificato per venire incontro alle esigenze specifiche delle ATI. Ora, dato che da qui a due minuti mi scorderò come ho fatto a mettere in piedi il tutto, meglio scrivere questo tutorial modificato in modo da tenermi un bigino utile alla prossima formattazione.
Due o tre considerazioni preliminari:
- Xgl (X Over OpenGL) è un’architettura X server, sviluppata da Novell, che si avvale delle OpenGL per gestire al meglio il rendering 3D accelerato offerto dalle più recenti schede video.
- Compiz è un window manager sviluppato da Novell, che sfrutta le OpenGL e le estensioni composite per gestire al meglio le potenzialità grafiche messe a disposizione dal server Xgl.
Ok, here we go!
Prelevare i componenti
Il primo passo consiste nel rendere il più semplice possibile il lavoro, inserendo in
/etc/apt/sources.list
i seguenti repository:
deb http://www.beerorkid.com/compiz/ dapper main

deb http://xgl.compiz.info/ dapper main

deb-src http://xgl.compiz.info/ dapper main
Da qui verranno scaricati i pacchetti contenenti il server grafico, il window manager e le librerie e le utility che ci servireanno. Dato che non si tratta di pacchetti ufficiali, la loro firma non verrà accettata, a meno di scaricane la chiave e aggiungerla al keyring usato da apt:
sudo wget http://www.beerorkid.com/compiz/quinn.key.asc -O - | sudo apt-key add -
Ora, non rimane che installare i pacchetti necessari a dare un po’ di brio al desktop, iniziando con un aggiornamento della lista ottenuta dai depositi:
sudo apt-get update

sudo apt-get dist-upgrade

sudo apt-get install xserver-xgl compiz-gnome libglitz-glx1 libgl1-mesa
Configurare GDM
Sarà GDM a occuparsi di lanciare Xgl quando sarà il momento di accedere al sistema, quindi è proprio questo componente che va configurato affinché possa prendersi carico del lavoro.
Se provenite da Kubuntu, vi converrà installare Gnome e quindi accertarsi che GDM sia il display manager predefinito:
sudo apt-get install gnome

sudo dpkg-reconfigure gdm
Installare i driver ATI accelerati
Per poter sfruttare l’accelerazione grafica in 3D delle schede ATI è necessario scaricare i driver proprietari direttamente dal sito del produttore e installarli sul proprio sistema.
Al momento è disponibile la versione 8.27.10, di cui consiglio l’utilizzo, avendo sperimentato diversi crash con la versione 8.25.
Scaricati i driver, non rimane che lanciare l’installer che li racchiude, facendo in modo che generi i pacchetti .deb utili a razionalizzare l’installazione:
sudo chmod +x ati-driver-installer-8.27.10-x86.run

sudo ./ati-driver-installer-8.27.10-x86.run --buildpkg Ubuntu/dapper

Creating directory fglrx-install

Verifying archive integrity... All good.

Uncompressing ATI Proprietary Linux Driver-8.27.10......

==================================================

ATI Technologies Linux Driver Installer/Packager

==================================================

Generating package: Ubuntu/dapper

/tmp/fglrx.E0RA9n /usr/src/ati/fglrx-install

Package /usr/src/ati/xorg-driver-fglrx_8.27.10-1_i386.deb has been successfully generated

Package /usr/src/ati/xorg-driver-fglrx-dev_8.27.10-1_i386.deb has been successfully generated

Package /usr/src/ati/fglrx-kernel-source_8.27.10-1_i386.deb has been successfully generated

Package /usr/src/ati/fglrx-control_8.27.10-1_i386.deb has been successfully generated

Package /usr/src/ati/fglrx-sources_8.27.10-1_i386.deb has been successfully generated

/usr/src/ati/fglrx-install

Removing temporary directory: fglrx-install
Ora vi trovate con una serie di pacchetti, pronti per l’installazione, fra questi, tra l’altro, anche i sorgenti dei moduli del kernel deputati all’accelerazione della scheda grafica.
Installiamo i driver:
sudo dpkg -i *.deb
I sorgenti del modulo fglrx, che si occupa dell'accelerazione 3D della scheda video, sono installati. Non rimane che compilarli ma, volendo semplificare il lavoro, meglio farsi aiutare da un'ottima utility, ovvero module assistant. Installiamola:
sudo apt-get install module-assistant
E ora, un attimo di attenzione. Se avete già utilizzato module-assistant per creare il modulo fglrx in una versione adatta a un driver xorg precedente, semplicemente installare i nuovi sorgenti e lanciare la compilazione non darà i risultati sperati: si rimarrà con il vecchio modulo fra le mani e un errore che viene mostrato solo nel log di Xorg e dal comando
fglrxinfo
che dirà, molto cripticamente, che si stanno utilizzando le libreria Mesa per l'accelerazione grafica non hardware.
E' necessario, in questo caso, ripulire la directory di compilazione del modulo del kernel. Ma ci sono moduli fglrx compilati sul sistema?
sudo module-assistant search fglrx
fglrx-kernel-source (source package not installed):
-- Binary package(s) for kernel(s):
+ (2.6.17.3): fglrx-kernel-2.6.17.3_8.27.10-1+10.00.Custom_i386.deb
Beh, direi proprio di si. Nel mio caso, si tratta del pacchetto fglrx nuovo, dato che ho lanciato il comando dopo la sua compilazione e la sua installazione. Nel caso voi abbiate compilato un vecchio modulo fgrlx, troverete indicato il numero di versione corrispondente.
E' tempo di fare un po' di pulizia, per evitare problemi di compilazione:
sudo module-assistant clean fglrx
E ora si può passare alla vera e propria compilazione, installazione del pacchetto e rigenerazione delle dipendenze:
sudo module-assistant prepare

sudo module-assistant update

sudo module-assistant build fglrx

sudo module-assistant install fglrx

sudo depmod -a
Con i moduli abbiamo finito, è tempo di mettere le mani sul file di configurazione di Xorg.
Il file di configurazione di Xorg
Dato che Xgl funziona sull'architettura di Xorg, andrà modificato quest'ultimo affinché fornisca l'accelerazione necessaria a sfruttare la ricchezza grafica offerta dal primo. Lasicamo, però, che sia l'utility aticonfig a eseguire le prime modifiche sul file si configurazione di Xorg
/etc/X11/xorg.conf
Semplicemente, basterà lanciare
sudo aticonfig --initial

sudo aticonfig --overlay-type=Xv
Aprite il file di configurazione
/etc/X11/xorg.conf
e assicuratevi che le parti evidenziate siano presenti così come le vedete scritte. In caso contrario, copiate dall'esempio qui riportato, rispettando le sezioni di appartenenza:
# /etc/X11/xorg.conf (xorg X Window System server configuration file)
#
# This file was generated by dexconf, the Debian X Configuration tool, using
# values from the debconf database.
#
# Edit this file with caution, and see the /etc/X11/xorg.conf manual page.
# (Type "man /etc/X11/xorg.conf" at the shell prompt.)
#
# This file is automatically updated on xserver-xorg package upgrades *only*
# if it has not been modified since the last upgrade of the xserver-xorg
# package.
#
# If you have edited this file but would like it to be automatically updated
# again, run the following command:
# sudo dpkg-reconfigure -phigh xserver-xorg
#Section "InputDevice"
# Driver "wacom"
# Identifier "stylus"
# Option "Device" "/dev/wacom" # Change to
# # /dev/input/event
# # for USB
# Option "Type" "stylus"
# Option "ForceDevice" "ISDV4" # Tablet PC ONLY
#EndSection
#
#Section "InputDevice"
# Driver "wacom"
# Identifier "eraser"
# Option "Device" "/dev/wacom" # Change to
# # /dev/input/event
# # for USB
# Option "Type" "eraser"
# Option "ForceDevice" "ISDV4" # Tablet PC ONLY
#EndSection
#
#Section "InputDevice"
# Driver "wacom"
# Identifier "cursor"
# Option "Device" "/dev/wacom" # Change to
# /dev/input/event
# # for USB
# Option "Type" "cursor"
# Option "ForceDevice" "ISDV4" # Tablet PC ONLY
#EndSection
Se non avete tavolette grafiche o altre amenità del genere, assicuratevi che il blocco evidenziato qui sopra sia commentato. Ciò vi eviterà di osservare una gran quantità di errori nel file di log, relativi a queste periferiche non rilevate, sebbene erroneamente abilitate
Section "ServerLayout"
# InputDevice "stylus" "SendCoreEvents"
# InputDevice "cursor" "SendCoreEvents"
# InputDevice "eraser" "SendCoreEvents"
Per la stessa ragione, va commentato il blocco appena visto.
Identifier "Default Layout"
Screen "Default Screen" 0 0
InputDevice "Generic Keyboard"
InputDevice "Configured Mouse"
InputDevice "Synaptics Touchpad"
EndSection
Section "Files"
# path to defoma fonts
FontPath "/usr/share/X11/fonts/misc"
FontPath "/usr/share/X11/fonts/cyrillic"
FontPath "/usr/share/X11/fonts/100dpi/:unscaled"
FontPath "/usr/share/X11/fonts/75dpi/:unscaled"
FontPath "/usr/share/X11/fonts/Type1"
FontPath "/usr/share/X11/fonts/100dpi"
FontPath "/usr/share/X11/fonts/75dpi"
FontPath "/var/lib/defoma/x-ttcidfont-conf.d/dirs/TrueType"
EndSection
Section "Module"
Load "bitmap"
Load "ddc"
Load "dri"
Load "extmod"
Load "freetype"
Load "glx"
Load "int10"
Load "type1"
Load "v4l"
Load "vbe"
EndSection
Da non dimenticare l'abilitazione dell'accelerazione grafica...
Section "InputDevice"
Identifier "Generic Keyboard"
Driver "kbd"
Option "CoreKeyboard"
Option "XkbRules" "xorg"
Option "XkbModel" "pc105"
Option "XkbLayout" "it"
EndSection
Section "InputDevice"
Identifier "Configured Mouse"
Driver "mouse"
Option "CorePointer"
Option "Device" "/dev/input/mice"
Option "Protocol" "ExplorerPS/2"
Option "ZAxisMapping" "4 5"
Option "Emulate3Buttons" "true"
EndSection
Section "InputDevice"
Identifier "Synaptics Touchpad"
Driver "synaptics"
Option "SendCoreEvents" "true"
Option "Device" "/dev/psaux"
Option "Protocol" "auto-dev"
Option "HorizScrollDelta" "0"
EndSection
Section "Monitor"
Identifier "Monitor Generico"
HorizSync 28.0 - 72.0
VertRefresh 43.0 - 60.0
Option "DPMS"
EndSection
Section "Device"
Identifier "ATI Technologies, Inc. ATI Default Card"
Driver "fglrx"
Option "VideoOverlay" "on"
Option "OpenGLOverlay" "off"
Option "AGPMode" "4"
Option "AGPFastWrite" "True"
Option "EnablePageFlip" "True"
BusID "PCI:6:0:0"
EndSection
Le opzioni appena viste fanno un po' di tutto, dal caricamento del driver fglrx a qualche ottimizzazione per aumentare la velocità di calcolo.
Section "Screen"
Identifier "Default Screen"
Device "ATI Technologies, Inc. ATI Default Card"
Monitor "Monitor Generico"
DefaultDepth 24
SubSection "Display"
Depth 1
Modes "1440x900"
EndSubSection
SubSection "Display"
Depth 4
Modes "1440x900"
EndSubSection
SubSection "Display"
Depth 8
Modes "1440x900"
EndSubSection
SubSection "Display"
Depth 15
Modes "1440x900"
EndSubSection
SubSection "Display"
Depth 16
Modes "1440x900"
EndSubSection
SubSection "Display"
Depth 24
Modes "1440x900"
EndSubSection
EndSection
Section "DRI"
Mode 0666
EndSection
Fatto questo, è tempo di modificare i file di configurazione di GDM.
GDM
Il primo file a essere leggermente cambiato è proprio
/etc/gdm/gdm.conf
In questo file, cercate nella sezione
[servers]
modificate la riga
0=Standard
in
1=Standard
E commentate tutto ciò che inizia per 0, fino in fondo. In pratica, dovrete avere il seguente blocco:
[servers]

# These are the standard servers.  You can add as many you want here and they

# will always be started.  Each line must start with a unique number and that

# will be the display number of that server.  Usually just the 0 server is

# used.

1=Standard

#1=Standard

# Note the VTAllocation and FirstVT keys on Linux and FreeBSD.  Don't add any

# vt arguments if VTAllocation is on, and set FirstVT to be the first

# vt available that your gettys don't grab (gettys are usually dumb and grab

# even a vt that has already been taken).  Using 7 will work pretty much for

# all Linux distributions.  VTAllocation is not currently implemented on

# anything but Linux and FreeBSD.  Feel free to send patches.  X servers will

# just not get any extra arguments then.

#

# If you want to run an X terminal you could add an X server such as this:

#0=Terminal -query serverhostname

# or for a chooser (optionally serverhostname could be localhost):

#0=Terminal -indirect serverhostname

#

# If you wish to run the XDMCP chooser on the local display use the following

# line

#0=Chooser
## Note:
# is your X server not listening to TCP requests? Perhaps you should look at
# the security/DisallowTCP setting!
# Definition of the standard X server.
[server-Standard]
name=Standard server
command=/usr/bin/X -br -audit 0
flexible=true
# Indicates that the X server should be started at a different process
# priority. Values can be any integer value accepted by the setpriority C
# library function (normally between -20 and 20) with 0 being the default. For
# highly interactive applications, -5 yields good responsiveness. The default
# value is 0 and the setpriority function is not called if the value is 0.
#priority=0
# To use this server type you should add -query host or -indirect host to the
# command line.
[server-Terminal]
name=Terminal server
# Add -terminate to make things behave more nicely
command=/usr/bin/X -br -audit 0 -terminate
# Make this not appear in the flexible servers (we need extra params anyway,
# and terminate would be bad for xdmcp choosing). You can make a terminal
# server flexible, but not with an indirect query. If you need flexible
# indirect query server, then you must get rid of the -terminate and the only
# way to kill the flexible server will then be by Ctrl-Alt-Backspace.
flexible=false
# Not local, we do not handle the logins for this X server.
handled=false
# To use this server type you should add -query host or -indirect host to the
# command line.
[server-Chooser]
name=Chooser server
command=/usr/bin/X -br -audit 0
# Make this not appear in the flexible servers for now, but if you wish to
# allow a chooser server then make this true. This is the only way to make a
# flexible chooser server that behaves nicely.
flexible=false
# Run the chooser instead of the greeter. When the user chooses a machine they
# will get this same server but run with "-terminate -query hostname".
chooser=true
A dire il vero, basterebbe anche solo la modifica da 0 a 1 nella prima riga per impedire che venga lanciato l'Xserver standard, ma meglio andarci con i piedi di piombo fino a quando non avrò sperimentato delle configurazioni ottimizzate.
Ora è il turno del file
/etc/gdm/gdm.conf-custom
Apritelo e inserite le seguenti istruzioni:
[servers]

1=Xgl
[server-Xgl]
name=Xgl server
#la prima riga va bene per schede ATI
#la seconda va bene per schede nVidia
command=/usr/bin/Xgl :1 -fullscreen -ac -accel glx:fbo -accel xv:fbo
#command=/usr/bin/Xgl -ac -accel glx:pbuffer -accel xv:fbo
flexible=true
Il contenuto di questo secondo file dovrebbe eseguire un override sulle impostazioni del primo. In effetti non è così o, almeno, non lo è sempre: senza aggiungere 1=Xgl anche in gdm.conf il gioco non funziona, nel mio caso.
Configurare Gnome
Non rimane che configurare Gnome affinché lanci cgwd, il window decorator e compiz. Pr fare ciò, basterà accedere al menu
Sistema -> Preferenze -> Sessioni
e quindi selezionare l'etichetta
Avvio Programmi
Qui aggiungete queste due stringhe, una alla volta:
cgwd --replace
compiz --replace gconf --sm-disable
Finito. Non rimane che riavviare il sistema e godersi i nuovi effetti grafici con finestre elastiche, ombreggiature diffuse e il famigerato cubo, che potrete ruotare tenendo premuti contemporaneamente
CTRL + ALT + Frecce
oppure, sempre tenendo premuti CTRL + ALT, provate a trascinare il desktop a destra e a sinistra, oppure date un'occhiata all'effetto Exposè, per passare da un'applicazione all'altra, abilitato tramite il tasto
F12
Ma anche ALT + TAB non è da meno...
Link:
Pollycoke Ubuntu Dapper + XGL + Compiz Guide
Ubuntu Dapper Installation Guide
Su quale tipo di scheda mi faresti puntare… di solito compro da essedi e a quanto pare di nVidia AGP non ha nulla (solo PCI express ahime non supportate dalla mia scheda madre)
Non saprei, non me ne intendo molto di schede video. Prova a dare un’occhiata alle discussioni sui forum che trovi nel sito di Compiz. Sicuramente troverai diversi riferimenti a modelli utilizzabili.
salve,
io ho installato una x1600 radeon ati e i driver li ho aggiornati con il programma ENVY ma beryl non funziona! ho segutio mille guide ma senza risultati… AIUTO
Ciao, ho provato ad eseguire un xclock da locale e funziona, l’xhost all’interno è aperto a tutti (gli avevo dato un xhost , non molto consigliato, ma per provare è ok), sulla macchina remota gli ho dato l’export del display, ma nulla non ne vuole sapere: can’t open display!!!
Qualche consiglio???
(macchina locale ubuntu 10.04 Lucid Lynx – macchina remota IBM aix)